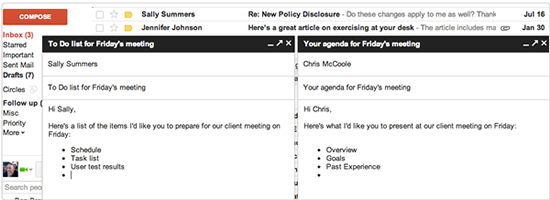
Gmail’s new compose experience 
Gmail
is rolling out out a new compose experience where you can write
messages in a cleaner, simpler format that puts the focus on your
message itself, not all the features around it.
Here’s how to try the new compose experience, as well as a quick look at key changes.
What’s different at a glance...
 * * |
|
How to try the new experience...
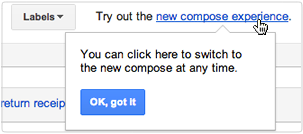 * * |
After clicking the Compose button, click the “new compose experience” link at the top of the message.
If you change your mind, you can temporarily switch back to Gmail’s previous experience. Open the Compose window, click the More options icon, and select “Temporarily switch back to old compose.”
|
A closer look at some changes...
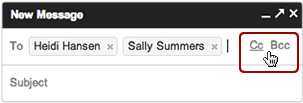 * * |
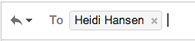
Entering addresses
Enter addresses as usual in the To field (labeled Recipients when you’re not adding addresses).
While adding addresses, click the Cc or Bcc link to display fields for entering those recipients, too.
|
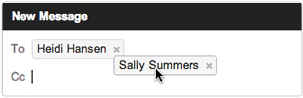 * * |
You can even drag recipients between fields.
|
 * * |
Finding the right contacts
If the contact you want doesn’t show up in the autocomplete list, you can click To, Cc, or Bcc to open a dialog for selecting contacts. Choose My contacts or All contacts from the drop menu or enter a query in the Search bar to narrow your results.
Check
the box of each contact you want to add to your message (addresses you
select appear at the bottom of the dialog). When you're done, click Select to add the addresses to your message.
|
 * * |
Modify addresses
|
Your window grows as you type!
To accommodate longer messages, your writing pane grows as your message gets longer.
To make the window even bigger, click the
 icon to open it in a separate window. Use the other two icons to minimize or close the window, which also saves your draft. icon to open it in a separate window. Use the other two icons to minimize or close the window, which also saves your draft. | 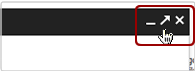 * * |
 * * |
Formatting text
Click the
 icon to see text formatting options, such as font size, bold, underline, and bullets. icon to see text formatting options, such as font size, bold, underline, and bullets.
|
 *
*
Remove Formatting
Click the
 icon to remove formatting from the text in your message. To view all emails in plain text, go to More Options and select Plain text. icon to remove formatting from the text in your message. To view all emails in plain text, go to More Options and select Plain text. |  * * |
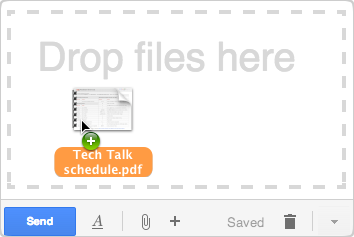 * * |
Attachments, photos, and links
Add attachments by dragging from your desktop or Drive to the body of the message.
Or click the
 icon to browse for a file to attach. icon to browse for a file to attach.
|
 *
*
Tooltips and keyboard shortcuts
If you're not sure what an icon does, point at it to see a pop-up description.
For many actions, the description also includes a keyboard shortcut for performing the action without having to display the icon.
|  * * |
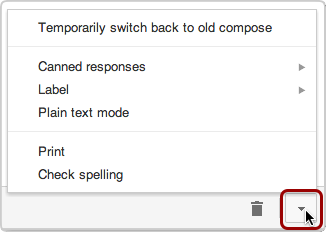 * * |
Spell check, printing, and labels
Click the More options menu to see other tools, such as check spelling, plain text mode, print, and adding labels or canned responses.
|
 * * |
Reply, Reply all, & Forward
When replying to a message, open the Reply menu next to the recipient's name to display options to reply, reply all, or forward the message.
|
Edit your recipient list
Click in the recipient field...
|  * * |
to open an edit field for adding or removing addresses.
|  * * |
 * * |
Change a message subject
When replying to a message, open the Reply menu next to the recipient’s name and choose Edit subject. This copies the message to a new thread where you can enter a new subject.
|
Compose multiple messages at once!
While composing one message, click Compose
again to open another window. Minimize drafts you’re not working on now
to keep them handy for when you want to finish them later.