Showing posts with label #14weekchallenge. Show all posts

Monday, July 25, 2016

Summer Collaboration Challenge: Week10 - Recurring Events with Google Calendar #14weekchallenge

In week 9, we explored how to schedule a meeting with multiple guests by find a time where everyone is free.  Often times meetings will recur on a weekly or other scheduled basis.  This week we'll explore how to schedule a recurring meeting and make edits to some of the occurrences for dates that fall on holidays or have other conflicts without interrupting subsequent scheduled occurrences.


Recurring Events  
The following tutorial details how to setup a repeating event.  Try creating a recurring event with your co-workers, then make a change to one of the occurrences.  For example, create a meeting every Monday for the next 8 weeks.  Fast forward to September and move your event scheduled for Labor Day to Tuesday.  Were the subsequent occurrences affected?

https://support.google.com/calendar/answer/37115?hl=en&ref_topic=6270042

Make an existing event repeat

  1. Open Google Calendar.
  2. Click the event you want to update > More details.
  3. Under the date and time, check the box next to Repeat.
  4. Choose how often you want the event to repeat, and when you want the repeating event to end.
  5. Click Done.
  6. When you're done editing your event, click Save at the top of the page.
Monday, July 18, 2016

Summer Collaboration Challenge: Week9 - Scheduling a Meeting with Google Calendar #14weekchallenge

In week 3 we became familiar with Google Calendar basics and setup our Google Calendar to allow others to schedule meetings with us when we are free.  Before starting this week's tutorial, be sure that you have completed the "Configure Calendar" section in week 3's tutorial:  http://itsblog.manhattan.edu/2016/06/summer-collaboration-challenge-week3.html


Invite people to your Calendar event
Now that you are familiar with Google Calendar and have created your first event, let's explore how to invite others to your events.  Follow the instructions in this tutorial to create a meeting and invite guests.

https://support.google.com/calendar/answer/37161


** Be sure to explore the "Find a meeting time" section **

If the other guests have shared their calendar with you, you can use the "Find a time" feature to schedule an event at a time that works for everyone. You can compare up to 20 schedules at one time. 
Note: The "Find a time" feature is only available while using a computer, not the Google Calendar app.
  1. Open Google Calendar.
  2. Create a new event, or open an existing event (you may need to click Edit event first).
  3. Click the Find a time tab. If the other guests' calendars are shared with you, you'll see their schedules.
  4. Find a time. Use the arrows at the top to navigate between days.
  5. Once you've found a time, click the area within the calendar grid. The time will update at the top of the page.
  6. Click Save.
Note: You can only edit the event if you created the event yourself, or if the event organizer gave guests permission to modify the event.
All-day events: All-day events are shown at the top of the calendar grid. If a guest has an all-day event, they will appear available in the "Find a time" tab unless their event is set to show as "Busy." To schedule an all-day event, click the Week button and then click the area at the top of a day column.


Monday, July 11, 2016

Summer Collaboration Challenge: Week8 - Gmail: Tips and Tricks #14weekchallenge

Manhattan College provides a JasperNet account to all students and employees that comes with email powered by Gmail. As an EDU, your Gmail inbox comes with virtually unlimited storage - eliminating the need to constantly delete messages to save space. In fact, why delete messages at all? See the tips below to find ways to better manage your Gmail inbox.

Tip #1 -  Update your Email Signature
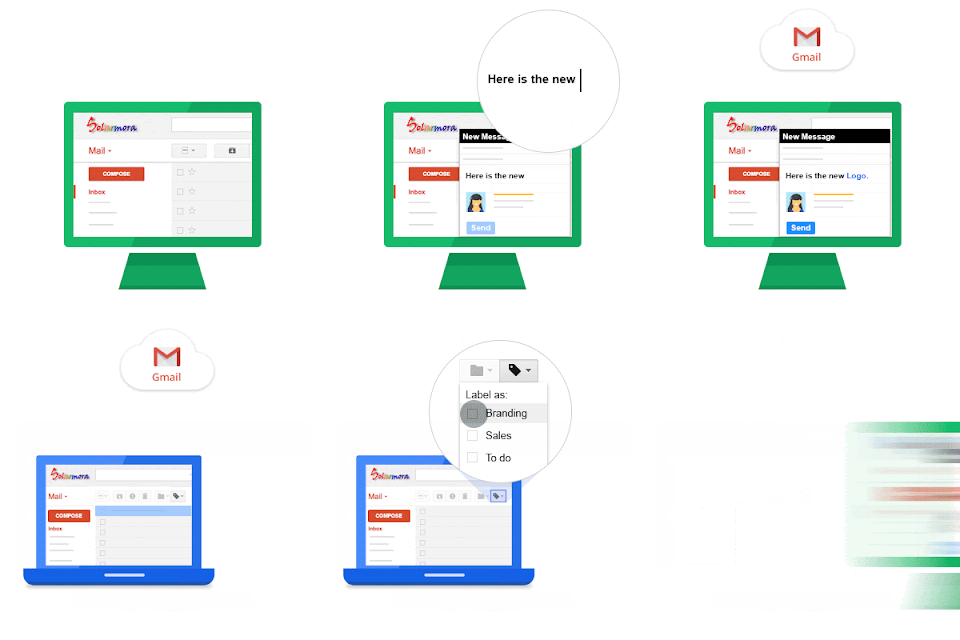
Having a well formatted and consistently branded email signature is a quick and easy way to make a good impression.  Manhattan College provides a template for all employees.  Follow the instructions below to update your email signature.

Tip #2 - Send mail from multiple addresses in one inbox
If you are responsible for several email accounts, you can send messages from any of your different addresses without manually switching between accounts. People you email can then see the address you chose listed as the sender.

Tip #3 - Focus on important messages with Priority Inbox
Want a better way to manage the number of emails in your inbox and how long it takes to go through them? Gmail’s Priority Inbox feature automatically separates your important messages from the rest of your emails so you get to them first. Over time, Priority Inbox gets better at predicting what’s important to you, helping you focus on the emails that matter.


Tuesday, July 5, 2016

Summer Collaboration Challenge: Week7 - Google Slides: Tips and Tricks #14weekchallenge

In week 2, we explored Google Docs, Sheets, and Slides as alternatives to Microsoft Office.  By now, you should be familiar with these applications and ready to take the next step by exploring advanced features as well as tips and tricks for making Docs, Sheets, and Slides easier to use and more featureful than Microsoft Office.

Slides
Google Slides is a great alternative to Microsoft Powerpoint.  This week we'll unlock additional features of Slides to show how Slides can become your default presentation application.  Let's start by reviewing some important tips for using Slides more effectively.


Tip #1 -  Keep your presentation on track by adding slide numbers
Make sure you and your audience know exactly where you are during a presentation by adding slide numbers. If your slides will be shared or printed later, the slide numbers are a handy reference for tracking your place in the presentation.

Tip #2 - Copy themes and styles you like from other presentationsWhen you see someone else’s presentation, you might like the theme they are using. Or, you might want to make sure all of your team’s or organization’s presentations have consistent styles and branding. Instead of creating the slides or themes from scratch, import them using Google Slides. 

Tip #3 - Let your audience submit and vote on questions during presentations
Plan a designated time slot for a Q&A session. If you can’t get through everyone’s questions, just answer the questions with the highest audience votes. Encourage shy people to interact by submitting questions anonymously, and in real time.
https://apps.google.com/learning-center/tips/slides/#/show-tip/let-your-audience-submit-and-vote-on-questions

See more tips here:
Slides Tips
https://apps.google.com/learning-center/tips/slides/#/list

Monday, June 27, 2016

Summer Collaboration Challenge: Week6 - Google Sheets: Tips and Tricks #14weekchallenge

In week 2, we explored Google Docs, Sheets, and Slides as alternatives to Microsoft Office.  By now, you should be familiar with these applications and ready to take the next step by exploring advanced features as well as tips and tricks for making Docs, Sheets, and Slides easier to use and more featureful than Microsoft Office.

Sheets
Google Sheets is a great alternative to Microsoft Excel.  This week we'll unlock additional features of Sheets to show how Sheets can become your default spreadsheet application.  Let's start by reviewing some important types for using Sheets more effectively.


Tip #1 - Keep headings or labels in place when scrolling through large spreadsheetsWhen you scroll through a large data set, sometimes the headings disappear and you lose context. To keep your headings from disappearing in Google Sheets, just freeze them in place.
https://apps.google.com/learning-center/tips/sheets/#/show-tip/keep-headings-or-labels-in-place

Tip #2 - Filter data in shared spreadsheets without changing what collaborators see
Ever wish you could save a particular filter in your spreadsheet? Create a filter view that only you can see and reuse.
https://apps.google.com/learning-center/tips/sheets/#/show-tip/filter-data-in-shared-spreadsheets

Tip #3 - Get Instant Insights into your data
A spreadsheet full of data can be daunting. Get summaries and charts of your data in the click of a button with Google Sheets. As you select different ranges of cells or columns, the charts update in real time. It’s kind of like having an expert in data analysis sitting next to you.

Monday, June 20, 2016

Summer Collaboration Challenge: Week5 - Google Docs: Tips and Tricks #14weekchallenge

In week 2, we explored Google Docs, Sheets, and Slides as alternatives to Microsoft Office.  By now, you should be familiar with these applications and ready to take the next step by exploring advanced features as well as tips and tricks for making Docs, Sheets, and Slides easier to use and more featureful than Microsoft Office.

Docs
Google Docs is a great alternative to Microsoft Word.  This week we'll unlock additional features of Docs to show how Docs can become your default word processing application.  Let's start by reviewing some important tips for using Docs more effectively.


Tip #1 - Access Docs ANYTIME - even without Internet access
Whether you are on an airplane or in a location with no Internet access, lack of connectivity shouldn’t prevent you from working in Google Drive. Set up offline access so you can access and edit your files any time.https://apps.google.com/learning-center/tips/docs/#/show-tip/access-stored-files-without-internet

Tip #2 - Share the PDF version of your Doc
Sometimes people prefer Adobe® PDF files because they’re easy to print, download, and open in existing programs. If you’re working in Google Docs or Google Sheets, there’s no need to convert your files to PDFs every time you want to share it in that format. Instead, use a link to aPDF version of your file.https://apps.google.com/learning-center/tips/docs/#/show-tip/send-link-to-pdf-version

Tip #3 - See sections of your document at a glanceNavigating long documents can be time-consuming and difficult. Google Docs outlines show you what the document covers so you can quickly jump between sections. The outline follows any styles or headers in your document. In longer documents where you haven’t specified headers, Docs creates them for you automatically. You can then edit or remove the headers in the outline as necessary.
https://apps.google.com/learning-center/tips/docs/#/show-tip/see-sections-in-your-document-at-a-glance


See more tips here:
Docs Tips
https://apps.google.com/learning-center/tips/docs/#/list

Monday, June 13, 2016

Summer Collaboration Challenge: Week4 - Simple Polls, Surveys, and Quizzes with Google Forms #14weekchallenge


Google Forms is an easy-to-use tool to quickly
create and share simple polls, surveys, or quizzes using your JasperNet account. With Google Forms, you can create and analyze surveys right in your web browser—no special software is required. Even better, multiple people can work at the same time, and every change is saved automatically.


Getting started with Google Forms
Let's start by getting familiar with Google Forms.  In this tutorial, we'll explore Forms basics including creating and customizing a simple survey as well as sharing and analyzing results.

Get familiar with Google Forms
Assignment (10 minutes): Complete the "Get Started with Forms" tutorial to create and share your first poll, survey, or quiz.

Monday, June 6, 2016

Summer Collaboration Challenge: Week3 - Your Personal Google Calendar #14weekchallenge

Did you know that your JasperNet account also 
includes a personal Google Calendar?  With Google Calendar, you can quickly schedule meetings and events, and get reminders about upcoming activities, so you always know what’s next.  This week we'll show you how to setup your Google Calendar to keep track of classes, meetings, and events as well as configure Calendar to let others know when you are available.

Getting started with Google Calendar
Let's start by getting familiar with Google Calendar.  In this tutorial, we'll explore Calendar basics including creating meetings, reminders, and invitations as well as customizing the look and function of Calendar. 

Configure Calendar
First, we'll need to make sure the Calendar is configured to securely share your Free/Busy information while keeping your event details private.


1 - Access Calendar by clicking the Google Apps menu and selecting "Calendar.  The Google Apps menu can be accessed from any Google app including Gmail.  

2 - In calendar, select the "gear" icon at the top right of the page and select "Settings". 

3 - In the Calendar Settings screen select "Calendars" from the top menu, then click the link for the first calendar in the list.  The first calendar should be your name.

4 - In the details screen, click "Share this Calendar" from the top menu.  Recommended settings are below.  Be sure to check the appropriate boxes and select "See only free/busy" from both drop-downs.
 Your calendar has now been configured to the recommended settings to share your availability with others while keeping your event details private.  


Get familiar with Google Calendar

Assignment (10 minutes): Complete the "Get Started with Calendar" tutorial to create and manage your first personal event, invite others, and set reminders.
https://apps.google.com/learning-center/products/calendar/get-started/

Tuesday, May 31, 2016

Summer Collaboration Challenge: Week2 - Docs, Sheets, and Slides #14weekchallenge

Still using Microsoft Office to edit files locally on your computer?

Forget where you saved that important Word Doc or Excel Spreadsheet?

Lose track of which document version you passed around for review?

Does your PowerPoint presentation look differently when you are presenting from a different computer?

With online editing and sharing of docs (Word), sheets (Excel), and slides (Powerpoint) your problems will be solved....

Getting started with Docs
Let's start by getting introduced to Docs - an online replacement for Microsoft Word.  The following tutorial will walk you through a number of steps to become more familiar with Docs.  The same can be repeated for Sheets (replaces Excel) and Slides (replaces PowerPoint).

Assignment (10 minutes):  Complete the "Introduction to Docs" tutorial by creating, editing, and sharing a new Doc.

Extra Credit:  Try the same tutorial for Sheets and Slides.
Slides - https://apps.google.com/learning-center/products/slides/get-started/


Working OFFLINE
Perhaps the most important recent feature update to Google Apps (Docs, Slides, and Sheets) is the ability to work offline without an Internet connection.  By enabling "Offline Mode" within Google Drive, you'll have access to edit all of your files from a Chrome browser wherever you are - even when WIFI is spotty or unavailable.

Assignment (1 minute):  Enable OFFLINE MODE for Google Drive.
https://apps.google.com/learning-center/products/drive/get-started/#section-2-3

note:  it may take a while to make all files and folders accessible offline.  After enabling "offline mode", disconnect from WIFI and try creating and editing a new Doc or Sheet.


Monday, May 23, 2016

Summer Collaboration Challenge: Week1 - Google Drive #14weekchallenge

Let's kick off week 1 of the #14weekchallenge by introducing Google Drive, or Drive for short.  Drive is part of your JasperNet account that provides virtually unlimited online storage space.  We'll explore various parts Drive as a foundation for future weeks.

Google Drive Basics

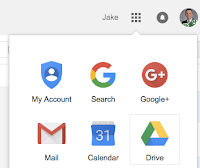
Starting to use Google Drive is a simple as clicking the Drive icon from the Google Apps menu at the top right of any Google App including Gmail.  ITS provides documentation on getting started with Google Drive as well as answers to commonly asked questions about using Drive here:

Assignment:  Click on the Google Apps menu and open Google Drive.  Upload a file.

Sharing

Once you have added files to Google Drive, you can choose to keep the files private (default) or share with colleagues or friends.  Files are accessible anywhere, from any device.  Locate the file that you just uploaded or add another file to explore sharing settings in Drive.

Assignment:  Share a file that you've uploaded to Google Drive.  

Finding Files - Add to My Drive

Finding files is easy with Drive.  Drive uses Google's powerful search technology to find files that best match your search.  Drive also allows you to add files that have been shared with you to your Drive - not by copying the file, but rather giving you direct access to the same file that has been shared with you.  Simply click the "Add to My Drive" icon to make the file available whenever you access Drive without the need to search.

Assignment:  Find a file that has been shared with you and add to "My Drive"


Drive Sync - Backup

Google Drive Sync brings the power of Google Drive right to your computer.  Drive Sync silently synchronizes files from your computer to the Google Cloud - giving you access to your files anywhere and anytime while still allowing you to edit them natively and locally on your computer.  Keeping all of your files in the Google Drive folder of your computer ensures that your files are safe, secure, and backed up to Google's Drive cloud.

Getting a new computer?  No problem, let Drive Sync transfer your files to the new computer without the need to manage cumbersome backups and file transfers.  It all happens behind the scenes while you work on more important things.

Assignment:  Install and configure Google Drive Sync
https://tools.google.com/dlpage/drive


Wednesday, May 18, 2016

ITS to launch 14-week Summer Collaboration Challenge #14weekchallenge #howispentmysummervacation

Starting Monday May 23rd, ITS will be releasing a series of weekly tips aimed at improving communication and collaboration within the Manhattan College Community.  A new tip will be available each week for the 14-weeks between commencement and the start of the 2016-2017 academic year. Whether you are on campus or at home - student or employee - anyone can participate!  

The 14-week Summer Collaboration Challenge will include tips and tricks ranging from basic to advanced topics such as email, Google Apps, ways to communicate to large audiences, better manage time and activities via online calendars, and many more. Participants will have the opportunity to complete each phase of the 14-week challenge at their own pace - all at once, or as topics are released. Track your progress by completing a short questionnaire at the end of each challenge and earn the 14-week Collaboration Challenge badge at the end of the program!